Pages

Showing posts with label patterns. Show all posts

Thursday, October 3, 2013

Handmade Halloween 2013, Part 1

I've always loved dressing up for Halloween; the theatrics of it all is so appealing! I believe it all started in 2nd Grade when my Mom made me my very own Annie dress. I felt so special and the dress was spot-on - I even had the wig, locket and Sandy plush! In my twenties, my love of dance paid off and I became a Walt Disney World Entertainment Cast Member. Not only did I dress up for a living then, I enjoyed coming up with fun Halloween costumes..all stemmed from the creativity (and resources!) I was lucky enough to work around. Now that I'm a mother, I'm just as excited to celebrate the holiday by helping my children make their costume wishes special. Big brother announced quite a while ago his choice - a Knight. We scored a shield and sword set at a local yard sale this summer, so a mommie-made tunic is in order to complete his look - easy and fun! What I didn't expect was Little Sister's strong opinion on her look...Princess Sofia! Or 'Fia as she's affectionately called by my girl!

  
I started out pricing a few pre-mades around town, but I just couldn't bring myself 
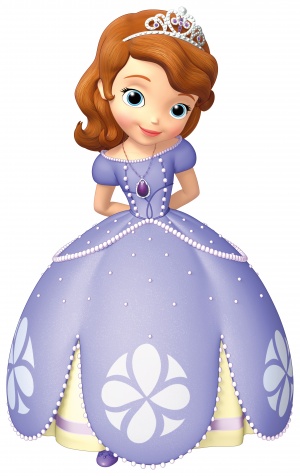
to shell out $20+ for a flimsy, asking-to-be-snagged dress. The request for a 'Fia dress has only grown stronger, so I knew it was time to make my girl her first princess ensemble. Thanks to Pinterest and awesomely generous sewing blogger tutorials, I made a plan and gathered my supplies. 

Princess Sofia's skirt holds the most detail, so I decided to put my focus there. It's basically a layered skirt, and Dana of MADE has a fantastic tutorial that walked me through. (She seriously has the BEST DIYs if you are ever looking for easy starter projects with professional results!) I started by assembling my two main layers, white and purple, and then figuring out the scallops. Our Ikea dinner plates were perfect!


Next up was the design within each scallop. I was thrilled to find a stencil from Melly Sews! I couldn't have had a better first experience with freezer paper stencils - so cute, easy and perfect.


Next I added white pom pom trim to the scalloped edges. I used a zigzag stitch allowing me to sew on top off the curved edges - major time saver! I also added a band of purple & white polka dot grosgrain ribbon to the white underskirt. It was a bit slippery to sew, so I attached it with Heat 'n Bond first making top stitching much easier!

Now it was time to figure out the bustle / peplum portion of the skirt. I played around with a few ideas trying to keep the third layer as simple as possible. I went with a version of Handmade Toast's hip poof's, cutting half circles in my sheer dotted fabric and serging their curved edge. I sewed the bustles to the purple layer, and then created the waistband casing between the purple layer and the white. Sounds confusing, right? It totally wasn't  - check out the first comment under the skirt tutorial. High fives for all of the helpful seamstresses out there!

Little Sister was so excited to see the 'Fia skirt today after preschool! She wouldn't hold still long enough for me to finalize the elastic sizing, so here's hoping we can get it done tomorrow. I also found the perfect shirt and a simple crown to complete the set. All that's left is an amulet and she'll be the cutest 'Fia in the land!

I'm thrilled to continue sewing labors of love for my children. Time to start work on my handsome Knight and get ready for a month of costume (and candy) fun!


Wednesday, June 26, 2013

Ruffled Shorts

Summer's here so inspiration struck to complete a project from the craft pile - a pair of shorts for little sister. She needed something to pair with an adorable top I thrifted earlier this year. Have I mentioned my love of consignment and thrift shopping?! Shopping in general is pretty awesome, but finding gently used treasure is the best! With two (impatient) children, I don't get to it as much as I'd prefer, but that's probably a blessing to the wallet and (full) closets. 

The Bailey Boys criss-cross top, vintage & thrifted
with Mommie-made ruffle shorts

Sometime this winter I cut out green polka-dot fabric intending to make my girl ruffle pants. I never got around to actually sewing them, so I decided to chop off the pant legs and sew up some sweet summer shorts! I just love the mix of gingham and polka dots! And in the spirit of mixing, I fused two patterns - Flat Front Pants from MADE and Ruffled Boxers from The Sewing Rabbit. My inspiration turned into a super easy pair of girly shorts that came together fast!


 I love how the ruffles curve up on the sides - a fun twist to a standard ruffle on a straight hem. They would be especially cute and comfy in knit, so I really need to get serious about some knit sewing practice! 

Happy Summer everyone!


Monday, May 27, 2013

Spring Projects

My poor little neglected blog! Now that I have an Iphone, Instagram is my new on-the-go spot to document crafty endeavors. However, here's a peek at what I've whipped up this Spring:


From the top left:
Personalized PBK pillowcase for a preschool friend's birthday
Gym shorts upgrade
Reversible tote bag & personalized bag tag
Bubble shorts
Old Navy dress upgrade
Consignment score upgrade
And the furthest right pics are the front & back views of little sister's Easter dress

If anyone has questions about the embroidery fonts, sewing patterns or materials used, please feel free to comment - I'm happy to share my sources.

Happy almost Summer!

Tuesday, September 25, 2012

Apple of my eye

My, it's been a long time since I posted here! Summer has come and gone, and so have a few projects without documentation. But here's a fun one I'm excited to share!


Recently I mentioned a great pants pattern + tutorial on Facebook. I first used it on a pair of ruffle pants for little sister. (Have you seen what boutiques charge for those? Craziness for something so basic and easy to to make!) Then I happened upon some adorable apple embroidered corduroy fabric on major clearance, so what's a Mommie to do? Whip up another fun pair of pants for the fall closet! Driving home from my unexpected fabric score, I remembered a reverse apple applique sitting in my embroidery files along with a blank shirt in need of decoration. Ah, how I love those meant-to-be moments!

  Shirt - Garanimals, WalMart
Apple Applique - file, Planet Applique & polka dot fabric, Joann
Pants - fabric & rick rack, Hancock

Happy Fall!


Tuesday, May 10, 2011

My DIY Nursery Curtains

In case you happened to miss my decorating train of thought for baby girl's room, you can get caught up here.
Now for a quick look back at what was hanging before in the baby boy nursery:
These were mommie made by my mommie, also known affectionately as "Mi" by big brother. It was bittersweet taking them down, but I've tucked them away, and hope to put the material to good sentimental use someday.

I'm a girl that likes to have a pattern to start with, so I did some online research to see if anything existed along the lines of my vision. The closest pattern I found was view A of McCalls 6093. It's a box valance meant to be board mounted, but the paper pattern was perfect for my fabric and lining. All I needed to add was a rod pocket - easy!
I can't help but giggle at the "Home Dec in a Sec" tagline they use on the envelope. Is DIY home decor truly possible in one second?! Not at my house.

After selecting and preparing my fabric, I measured both rod sections over the connecting windows to determine my custom panel widths. Turns out they were not exactly equal...gotta love older homes! Each panel was cut on a fold, so I made sure to carefully line up my stripes which is always a bit daunting. Luckily the pattern repeats easily, and the lining is solid. Next I lined up the pattern fold line at the appropriate half-width (including seam allowances) and got to pinning. To create the a-line on each side of the treatment, I used a fabric marker to draw a slant edge from pattern top to bottom, shown here:
I first extended the bottom cut line
and connected to the top cut line with a straight edge.

I always feel so accomplished once a project is cut out, don't you? Most of the logistics are finally figured out, and it seems at least half, if not more, of the battle is over. Finally time to get sewing!

Right before my first stitch, I draped the cut striped panels over the rods to determine matched placement of the inner middle seams. Even though I cut both panels with a-lines on each side (due to the fold), I wanted them to look continuous despite the small middle rod brace. Hopefully I'm making sense here! I marked each panel at a desired stripe near the brace, placed right sides together with my lining, and followed the mark sewing up a straight seam. Then I figured out exactly how much of a seam allowance I needed to carefully take on the a-line side. The goal was for the panel to hang perfectly flat across the rod. After ensuring I had sewn both side seams correctly, I cut the inner straight seam's a-line excess off. Unturned edges shown below:
I hemmed each panel thereafter, turned them right side out and pressed. Almost done!

Lastly I needed to create the rod pocket. I folded the open top down 1/4", pressed, and then folded and pressed down another 2". I sewed a straight seam across the lower pressed edge. Done! Time for their debut!

I'm really pleased with the results of the these simple, classic curtains. They even inspired me to deep clean the blinds, windows, trim and sills. If only I could bottle this nesting energy! I hope my how-to ramblings made sense - thanks for following along or at least trying to!


Sunday, May 1, 2011

Boppy Cover

Photobucket
Boppy Covers are a super easy and fun nesting project. I purposely bought a Naked Boppy back before my son was born just so I could sew my own unique covers. Naturally on top of my project list for baby girl was a new mommie-made cover just for her!
Photobucket
Isn't the pale pink, gray and white sweet?!

Inspired to make your own?! This printable pattern via Scribd (which no longer appears to link to a current blog) includes instructions and is a fantastic reference for all sewing levels:
Photobucket

Once assembled, I found the pattern to be a bit large, so I made my own that falls somewhere between it and my actual pillow. Then I cut my fabric, placed the zipper and got stitching. It comes together SO quickly!

I also suggest adding some top stitching to reinforce the zipper ends once you've turned the cover right side out:
Photobucket

And there you go - a personalized cover!
Soft, sweet and simple. 
Photobucket

The countdown is on with less than 30 days to go until we meet our girl. Wow! Guess I need to pack my bag and stack this necessity right on top. But for now, back to nesting with more crafty posts to follow!

Friday, February 11, 2011

Shopping Cart Cover

This post is a fun trip down memory lane. My about-to-turn-three boy no longer likes riding in the cart, unless it's in the main part taking up entirely too much room or standing on the side holding on like a renegade. Neither makes for a pleasant shopping experience these days, so it's nice to remember a time I could pack a Snack Trap, plop him in my mommie made snuggly cover and attempt some shopping. But how did I get our errands done I wonder - the cuteness is just too much!


My cart cover coordinating fabrics, batting and elastic came from good ol' Hancock Fabrics. Have I mentioned there's a store less than 3 minutes from our house...dangerous but oh so convenient! And you may remember, the cute fabric found even more life here recently.

I constructed the cover using McCall's Crafts pattern 5721. The project was surprisingly easy, especially since I omitted the slits for the cart belts and made no travel bag. Have you noticed that cart belts always seem quite nasty if they're even there at all? Plus, trying to strap a baby in them is usually a struggle and who wants their sweet bambino touching and sucking on all that grime?! I always kept a close eye on my boy who always seemed fine and loved his soft warm cover. I adored that it fit every cart we crossed including restaurant high chairs. It was easy to wad up, carry in, wrap around abandoned Cheerios & toys, throw in the wash and return to the car. Looking back I'm sure I barely had time to whip up the cover, but am so glad I did - it was a staple back in the baby days! It garnered quite a few compliments and I'm excited to use it again with baby girl.


May your weekend be filled with happy smiles, memories & giggles!


Sunday, July 25, 2010

Christmas In July

Santa Claus is coming to town...in exactly 5 months that is! As the Christmas countdown begins, let's use our holiday spirit to cool off a bit shall we?! I'm already skipping down peppermint lane fondly reminiscing about my son's first homemade holiday romper:


Another infamous use of Easy McCall's pattern #2033, minus pockets, and cut to size 1. The fabric is adorable, yet handsome red mini gingham (also used here) lined in the same white goodness used in the 1st romper. Now the super fun stuff - embroidery! I used chocolate brown corduroy to accentuate the Rudolph Applique. And the shoulder button holes are embroidered too - stockings! I can't seem to find them on Embroidery Library anymore...perhaps it's due to some sizing issues. (I had to experiment with several sizes of buttons besides the ones suggested.)


I can hardly believe 2010 will be my 3rd Christmas as a mommie. I'm officially a goober adult that totally gets what all those grown-ups mean when they say "TIME FLIES." ha ha I get a little misty looking back at my sweet baby boy...but it just keeps getting better & better!

Friday, July 9, 2010

The First Romper

I can hardly believe that I made my son his first homemade romper 2 whole years ago! How far we've come from the days of baby boy delights and sleepless nights. This mommie is sooo thankful for sleep in toddler-land! Thinking back, I'm astonished and quite proud that I actually made this little outfit. It was the start of a brand new creative path that I am so happy to be walking on!

Materials & Construction: I used Easy McCall's pattern #2033, minus pockets, and cut to size 1 with generous seam allowances as my son was only 6 months old at his first wear. The striped fabric was in my stash, and the front lining was leftover from the nursery curtains my mother made...have I mentioned this creative thing runs in the family?! The bee embroidery is from Embroidery Library. (it's so sweet that I've also used it here) I omitted the center bloom and inserted a monogram instead:
One of the biggest challenges was working with snap tape for the first time. It was a big puzzle of sorts, but I'm impressed with how professional it turned out!The first romper was great practice and still hangs in his closet...I can't bring myself to pack it up just yet. He wore it from 6 months to 15 months. I'm not quite sure how that feat happened as he is outgrowing clothing at record speeds currently. At least I got good use out of the pattern - check out my other fun rompers here and here!

Wednesday, March 17, 2010

Hippity Hoppity

The verge of spring has me fondly reviewing the romper I made my son for his 1st birthday - we had a frog party! The bad news is that he woke up with his 1st fever that morning and never made it into the outfit. The good news is that it turned into quite a fetching Easter ensemble! I kept it as a longall thru Spring, but as the summer progressed I hemmed the legs into shorts. Here's to warmer weather and sights of sweet seersucker!

Materials and Construction notes: I used Easy McCall's pattern #2033 and omitted the pockets. I added coordinating piping and lined the seersucker due to it's thinness. The vintage frog applique is from Embroidery Library. I also added a layer of batting under the applique to give Mr. Froggie a bit more dimension.

LinkWithin

Related Posts with Thumbnails