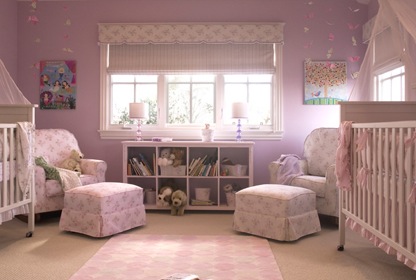
In case you happened to miss my decorating train of thought for baby girl's room, you can get caught up
here.
Now for a quick look back at what was hanging before in the baby boy nursery:

These were mommie made by my mommie, also known affectionately as "Mi" by big brother. It was bittersweet taking them down, but I've tucked them away, and hope to put the material to good sentimental use someday.
I'm a girl that likes to have a pattern to start with, so I did some online research to see if anything existed along the lines of my vision. The closest pattern I found was view A of
McCalls 6093. It's a box valance meant to be board mounted, but the paper pattern was perfect for my fabric and lining. All I needed to add was a rod pocket - easy!
 |
| I can't help but giggle at the "Home Dec in a Sec" tagline they use on the envelope. Is DIY home decor truly possible in one second?! Not at my house. | | |
After selecting and preparing my
fabric, I measured both rod sections over the connecting windows to determine my custom panel widths. Turns out they were not exactly equal...gotta love older homes! Each panel was cut on a fold, so I made sure to carefully line up my stripes which is always a bit daunting. Luckily the pattern repeats easily, and the lining is solid. Next I lined up the pattern fold line at the appropriate half-width (including seam allowances) and got to pinning. To create the a-line on each side of the treatment, I used a fabric marker to draw a slant edge from pattern top to bottom, shown here:
 |
| I first extended the bottom cut line |
 |
| and connected to the top cut line with a straight edge. |
|
|
I always feel so accomplished once a project is cut out, don't you? Most of the logistics are finally figured out, and it seems at least half, if not more, of the battle is over. Finally time to get sewing!
Right before my first stitch, I draped the cut striped panels over the rods to determine matched placement of the inner middle seams. Even though I cut both panels with a-lines on each side (due to the fold), I wanted them to look continuous despite the small middle rod brace. Hopefully I'm making sense here! I marked each panel at a desired stripe near the brace, placed right sides together with my lining, and followed the mark sewing up a straight seam. Then I figured out exactly how much of a seam allowance I needed to carefully take on the a-line side. The goal was for the panel to hang perfectly flat across the rod. After ensuring I had sewn both side seams correctly, I cut the inner straight seam's a-line excess off. Unturned edges shown below:

I hemmed each panel thereafter, turned them right side out and pressed. Almost done!
Lastly I needed to create the rod pocket. I folded the open top down 1/4", pressed, and then folded and pressed down another 2". I sewed a straight seam across the lower pressed edge. Done! Time for their debut!
I'm really pleased with the results of the these simple, classic curtains. They even inspired me to deep clean the blinds, windows, trim and sills. If only I could bottle this nesting energy! I hope my how-to ramblings made sense - thanks for following along or at least trying to!


