Pages

Showing posts with label Martha Stewart. Show all posts

Wednesday, February 16, 2011

Pipe Cleaner Flowers


It's teacher appreciation week at preschool...not sure how Valentine's week was chosen instead of the typical May celebration, but c'est la vie. The children are asked to bring in a flower for each teacher, so last year I started the handmade tradition. Tissue paper flowers were lots of fun, but this year I felt inspired to keep the materials uniform. And I loved the results!


It all started with a segment I caught awhile back on The Martha Stewart Show. I knew such a simple, yet lovely craft would come in handy one day! After watching a refresher how-to via video tutorial, I grabbed my pack of pipe cleaners and got to work. Instead of using a ring finger as my starting base, I grabbed a small wooden dowel. I ended up with a smaller loop better suited to thread the flower stem through. Each stem is a green pipe cleaner folded in half. I worked the 2 ends into the flower head, and then twisted to make the stem a tad bit thicker and more sturdy.

Before we headed off to school this morning, I added a sweet tag to each blossom in honor of teacher apprecation. You can print a free sheet of your very own tags over at eighteen25 - one of my new favorite blog finds!
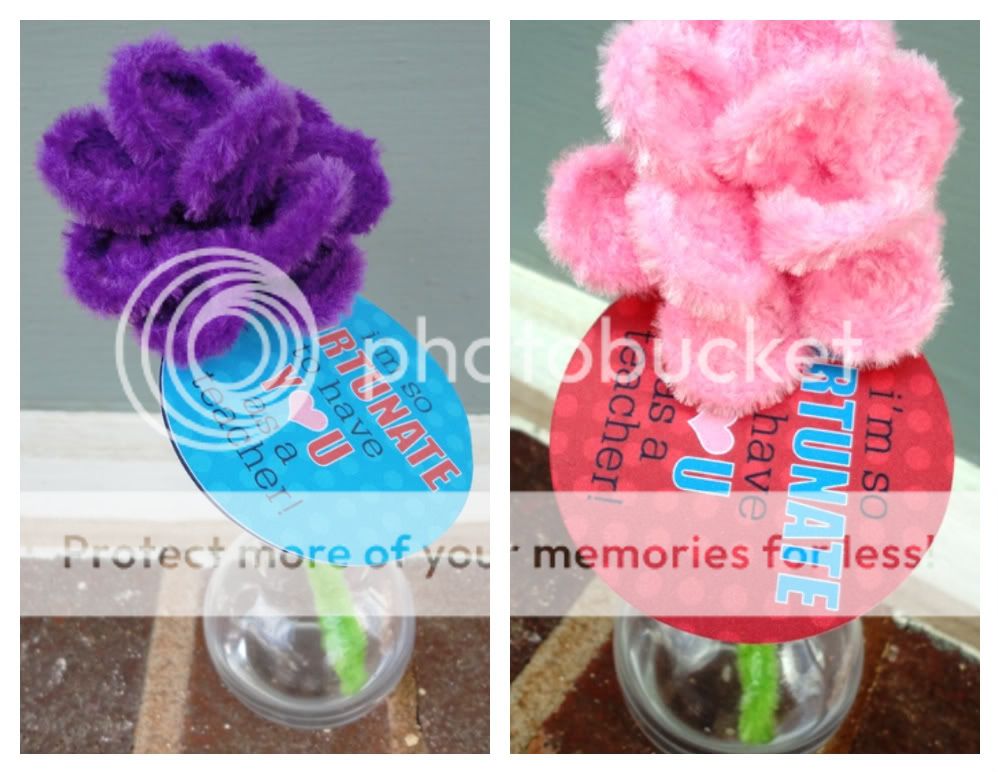
Big boy was so cute & proud carrying in these mommie-made florals. His teachers (and a few others) seemed to love them too - success! Thank you teachers for shaping our children and giving mommie some much appreciated child-free craft time!

Monday, November 22, 2010

Kicks, Crafts & Additions

photo courtesy of marthastewart.com

Two of my favorite things combined last week...The Rockettes & Martha Stewart! I was overjoyed to see the girls open Martha's show and even stick around to craft with her. I proudly auditioned to be a high-kicking Rockette back in my dancing days, and would currently love to craft with Martha...a creative girl always has a dream, right?!  Hop over to MarthaStewart.com if you missed the fun. The lobby of Radio City Music Hall even got the Martha treatment!

And with all of this talk about the Rockettes, it must officially be the holiday season. Is Thanksgiving really only 3 short days away?! At this point on the calendar, I usually have my son's holiday apparel stitched, pressed and hung waiting in the closet for holiday photos and events. This year the materials are still waiting for the magic to begin - aaaccckk! This mommie's got to get a move on. But my moves are a tad slower right now because baby #2 is baking away! It's been a rough 1st trimester, so I'm eager for some 2nd trimester relief. My mom will be visiting this week, so I'm thankful (as always!) for her cooking, crafting and decorating helping hands. Here's to kicking off my favorite time of year...and feeling some little baby kicks soon!

Thursday, August 5, 2010

Paper Flowers


This "green" mommie really enjoys using recycled materials. For example, I keep almost all of our household's gift packaging, including bags, tissue paper, ribbons,... all for re-use.  With August comes another year of school, so I thought I'd share a fun recycling project I made last school year for my son's preschool teachers.  Would you have guessed that the beauties above were made from Victoria's Secret tissue paper?!


To make your own,
gather the following supplies:
recycled tissue paper
crepe paper or felt
pipe cleaners
hot glue gun
*this is an existing template from MarthaStewart.com*


  1. Cut out the petal shapes (top box of template) from your tissue paper.  I folded my tissue in an accordion fashion to cut down on the number of cuts.  
  2. Cut out the single, smaller heart-shaped template from the crepe paper or felt.  I cut 2 for each stem, and used green crepe paper.  I had it on-hand and found it easy to work with since it stretches around curves easily.  
  3. Bend one end of a pipe cleaner making a soft small center tip on which to build you flower.
  4. Squeeze a small ring of hot glue slightly below the center tip and begin building the petals, single petals first, adding glue, and then the heart petals as you go.
  5. Affix the base leaves.
  6. Fluff petals and shape stems as desired.  Voila!
I bundled these in pairs with rick rack, and added a personalized note.  My son was excited to hand these over to his teachers.  It's never to early to learn that recycling can be beautiful!

LinkWithin

Related Posts with Thumbnails